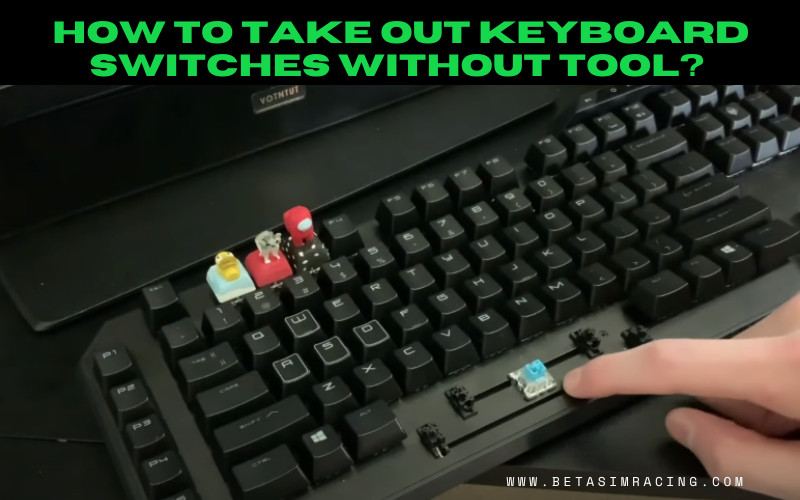
It all comes down to the touch, whether you’re seeking the greatest gaming keyboard, a clacker for regular usage, or a professional peripheral. Keyboards are more delicate than their analog predecessors, and switches can malfunction infrequently. Here’s how to swap it out without throwing away the keyboard. Although it requires a few tools and some knowledge, you can accomplish it.
You must be able to open the keyboard to access the printed circuit board, de-solder the broken switch using a soldering iron and pump, remove the switch, insert a replacement, and then solder the replacement switch into place.
Don’t worry if you have never soldered anything before. Although some soldering knowledge is helpful, the soldering you’ll be performing here is rather simple. Don’t worry; let’s do it together on how to replace switch on keypad.
How To Take Out Keyboard Switches Without Tool?

You can complete how to take switches out of the keyboard without a tool. I’ll show you how to change key switches without using any tools.
- Take the mechanical keyboard first.
- Take anything you can modify out from under the keys. It could be a credit card, paper clip, screwdriver, or a house or car key. The object must be able to put pressure under the keycap and lift it.
- If you have a paper clip, adjust it under the keycap by bending it.
- Pull it up slowly after adjusting it under the keycap.
- After exerting a few forces, the keycap will remove.
Read Also: How to Know if the Motherboard is Dead
Mechanical keyboard keycap removal is simple but requires caution because several delicate components, including switches, PCB boards, and RGB lights, are hidden behind the keycaps. Be careful when removing keycaps from mechanical keyboards because your key puller could damage these things and cause another issue.
The first thing to remember is to adjust the puller so that no backlit or blinding light causes harm before removing the keycap. The second step in removing mechanical keyboard keys is to turn off and unplug the keyboard before beginning.
Why Would I Want to Change the Switches on My Keyboard?
You might consider replacing the switches on your mechanical keyboard for a few reasons. One scenario is if you prefer some keys to have a distinct feel over others. One such preference is for the spacebar to be firmer than the other keys.
If your preferred switch or one you’d like to try is difficult to locate in a pre-built keyboard, that’s another incentive to replace the switches. Finally, perhaps you simply crave diversity. Changing the switches allows you to obtain a different experience without purchasing a new keyboard.
It resembles having several keyboards inside of one shell. It’s generally less expensive to replace switches than to purchase several keyboards, but it’s arguable whether doing so is simpler.
Can I Replace the Switches on My Keyboard?
Learning how to replace mechanical switches is a great skill. If you wish to replace the switches, it can give an aging keyboard new life. It can also restore defective keyboards because they chattered or improperly registered key presses.
While soldered switches must be physically connected to the circuit board, hot-swappable switches can simply be removed and replaced. You must disassemble the keyboard to access the circuit board and replace the soldered switches. Once there, you must resolder each switch you want to return.
How to Remove Switches from Keyboard by Using a Keycap Puller?

Let’s get started with the steps of how to replace switch on keypad:
- Step 1 : Find a keycap puller tool online or at an electronics repair shop. These tiny additions are made to wrap around keys so you can remove them without damaging them, or the switches sit on top. Ask around to check if any nearby electronics repair businesses sell these tools.
Keycap pullers come in wire and plastic varieties. Because they are more robust and unlikely to scratch the keys, wire keychains are preferred over plastic ones. However, you should choose the wire variety if you are worried about scratches. - Step 2 : Your keycap puller’s prongs should slide beneath a key’s edges. You should hear a click when a plastic keycap puller latches onto a key if you use one. To connect the wire loops underneath two of the key’s corners with a wire keycap puller, you must twist the handle once the prongs are there.
- Step 3 : To remove the key, raise the keycap puller. The key will easily detach from the switch it is attached to below. Take the key you just removed from the keycap puller and repeat the process if you need to remove more keys. With wire keycap pullers, you can take out three or four keys at once before having to remove the puller from the keys.
How Do You Fix a Broken Keyboard Switch by Using Household Tools?
How do you fix a broken keyboard switch? Let’s get started with these steps:
- Step 1 : Use a flathead screwdriver or butter knife as an alternative to a keycap remover. Check to see if the screwdriver or knife blade will fit between the keyboard’s keys. To avoid cutting yourself when using a knife, always use caution!
If you are concerned about minor surface damage to your keyboard, remember that a screwdriver or knife can easily scratch your keys and keyboard. - Step 2 : Use a paperclip to create a makeshift keycap puller. You can mold a paperclip to function like a keycap remover in place of a knife or flathead screwdriver. The paperclip can perform like a keycap puller by entirely unbending it, reshaping it into a “U,” and then bending the ends inside.
- Step 3 : Pry off the keycap by sliding your preferred keycap remover option below a key. Use your preferred tool to press upward until the key begins to pull off gently. If the key won’t come off completely with the tool in some circumstances, finish removing it using your fingers. To avoid accidentally launching the keys into the air and losing track, pry up the keys slowly.
How To Change Cherry MX Switches?
Let’s get started on the steps of how to take switches out of keyboard and change it:
- Remove the keyboard’s USB Type C connector by unplugging it.
- When you hear the key click, place the keycap puller over the key you want to remove.
- Hold the keyboard firmly with the opposite hand while pulling up the key puller.
- To remove the keycap, gently pull the cap until it comes off. Repeat until all keys have been taken out.
- To prevent missing caps, put all the lids in a secure place.
- After removing the keyboard’s caps, you should discover six Phillips #00 screws.
- Remove all six 2.00 mm screws from the board using the Phillips #00 screwdriver, then store them safely.
- Disconnect the base from the board.
- Keep in mind to wipe out the keyboard’s base.
- Two soldered pins are located close to each key on the keyboard when you turn the board over.
- Hold the soldering iron to the pins for a short period before removing them using the de-soldering pump.
- The pins should be able to move freely in the slots once both are free of solder.
- Turn the board over once more after removing both pins.
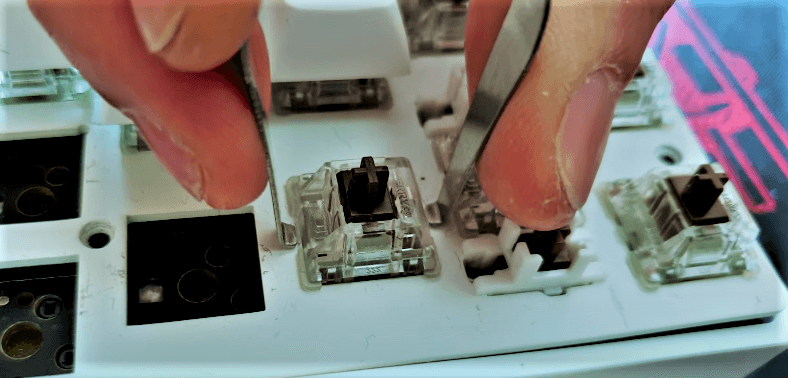
- Use the switch puller by positioning it over the switch vertically. Push the two tabs on the switches that you will see on them.
- Pulling up the switch puller while the tabs are pressed in should cause the switch to detach from the board.
- To install the new switch, align its two pins with the board’s slots and press down on it until you hear a click sound.
- Up until all switches have been changed, repeat steps 4-6.
- The two pins may be seen inside the slots for the letters when you turn the board over.
- When the pins are covered with solder, use the soldering iron to solder them to the board’s slots.
- Continue until all the switches are soldered to the board, then repeat for the second pin on the switch.
- Repeat Steps 1 and 2 in reverse order after all switches have been replaced.
How Long Do You Need to Replace Mechanical Keyboard Switches Last?
Mechanical keyboard key switches are meant to last for 10 to 15 years of constant use. A rating on some key switches indicates how many keypresses (often millions) they can tolerate.
How Can I Quiet Down My Mechanical Keyboard?
Put foam or a desk pad under your mechanical keyboard and oil the switches to make it quieter. If possible, swap out your clicky switches for linear ones.
Can You Fix a Broken Key?
The bad news is that you will need to replace a key if it is split in half because there is no way to fix it. While it would be alluring to attempt a DIY fix, such as gluing the key back together, you should refrain because doing so could result in further harm.

