Mounting your display or mountable computer monitor is an excellent method to free up space and cram more into a small workplace. It gives your workstation a cleaner, nicer-looking appearance. It is simple to install computer displays on a wall. All you need is a computer monitor with mounting hardware that includes monitor arms that can be attached to a wall.
Swivel arms on wall mounts also offer more viewing flexibility and range, allowing you to customize the display angle to your preferences and requirements, potentially reducing neck or eye strain typical of users spending extended periods in front of a computer. I’ll walk you through assembling and configuring your mount in the below sessions. Where you also learn can you mount a computer monitor on the wall?
Is it Worthwhile to Mount a Computer Display On A Wall?
You should mount your monitors on the arm attached to your desk rather than the wall if you utilize an adjustable standing desk. It is crucial because if you mount your monitors to the wall, they won’t adjust with the height of your desk when you do.
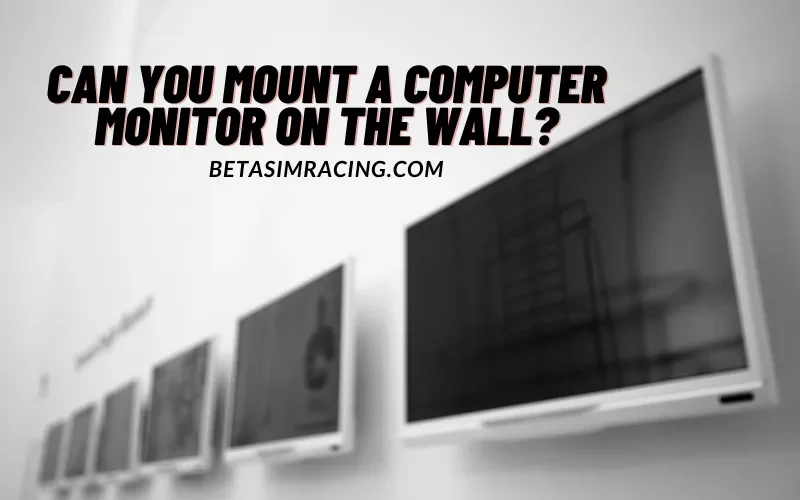
If your displays fix directly to your desk, you wouldn’t be able to do this. To get it affixed to the wall properly, you’ll need to have a few handyman-type skills (drilling, leveling, etc.), but you can do it.
Why Do You Use a Dual Computer Monitor Wall Mount?
Working with several monitors is easy and great for view. On my desk, I currently have two 32-inch 4K Dell monitors. Sadly, the two monitors take up valuable tabletop space I could use for my peripherals and other office supplies. So, mounting them on the wall frees up the space.
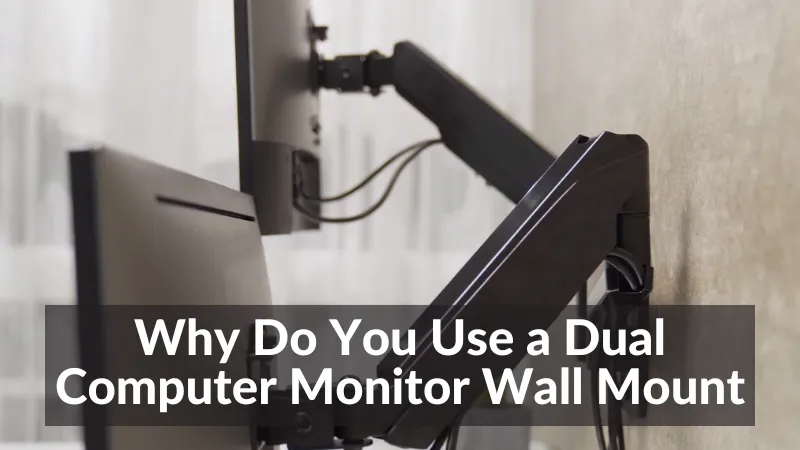
Remember one thing the primary monitor of a dual monitor setup should always place in front of the user. Center both monitors in front of the user if they use them for an equal length of time.
Can All Monitors Be Mounted?
Yes! all monitors can mount on all. Since most modern monitors have a mounting plate on the back, using widely used monitor mounting products is effortless. It is possible to attach even vintage CRTs or monitors without this arrangement. These only need a mount that fastens to the bottom or sides to keep it in place.
The best course of action is nearly always to look for a wall mount or rack mount whose design is especially suited to the monitor you are using. Some mounts will fit various monitors because manufacturers frequently adhere to the same or comparable requirements when creating mounting plates.
Are All Flat Screens Wall Mountable?
Absolutely any modern flat screen can hang on a wall. Most include mounting holes on the back that follow the VESA interface standard, making it quite simple to purchase a wall bracket that would fit.
First, it doesn’t matter if you have a Samsung, Sony, LG, or any other TV maker because practically all contemporary flat screens/TVs are standardized to suit the wall mount.
How Do I Know If My Monitor is Wall Mountable?
Simply look at the back to see if your computer monitor meets VESA requirements. If it complies, you should see the typical four-hole screw pattern at the back of your display. Larger monitors will have 200 x 100 mm screw holes, whereas the most typical screw hole design is either 75 x 75 mm or 100 x 100 mm.
What are VESA Standards? The organization that establishes the requirements for flat panel displays like TVs and monitors to mount on stands or wall mounts is called VESA, which stands for Video Electronics Standards Association.
By designing products that work with any bracket, monitor stand, or mount, irrespective of brand, these principles make it simpler for producers to meet consumer demands. VESA standards enable reasonably priced installation and general mount interchangeability. It increases viewing versatility and ergonomics.
How To Wall Mount A Monitor with Holes?
To place a monitor on the wall, you must first locate a suitable mounting bracket to hang a monitor on the wall. Hanger brackets, shelf mounts, stand-alone arms, and other varieties are many offered.
Most of the time, the monitor wall mount kit has everything needed to mount your monitor to the wall safely. To ensure that your mount is secured correctly, you should either fasten it to the studs hidden behind your drywall or use strong drywall anchors that can support the weight of your computer monitors and the movement that comes with moving them around.
After attaching the monitor arms to the wall, you should connect the mounting bracket to your monitor. You must fix your display in place by inserting screws through the holes provided on the monitor’s back. You need to attach your monitor to your mount after that finish, and you’re ready to go!
How To Wall Mount A Monitor Without Holes?
You don’t necessarily need to buy a new monitor simply because yours lacks mounting holes. You may take various approaches, depending on whether you want a cleaner look for your home office or you’re a renter who can only leave some wall holes.
Let’s look at the solutions:
Solution 1) Monitor Arms
How to mount monitor without VESA? Whatever your preferred mounting position, the monitor arm is the first kit you’ll use to mount your computer display. To create the best viewing angle with the monitor screen and keep a good posture, you can adjust the monitor’s angle, orientation, and depth with the monitor arm.
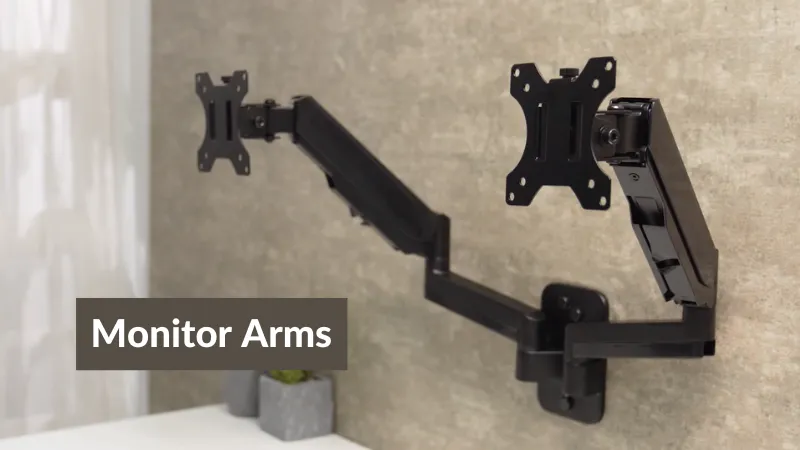
So, when it comes to ergonomics, this is a must-have tool for setting up a healthy workspace and gaming station, just like many other essential desk accessories. Additionally, you’ll need to invest in this equipment because you’re interested in creating an ergonomically balanced workstation setup.
Solution 2) A VESA Mount
Without requiring any screws or bolts, you may mount the screen to a wall or desk using VESA mounts. The VESA interface standard defines most surfaces with various sizes and designs. Find the four mounting VESA holes on the back of your monitor before attempting to install a VESA mount.
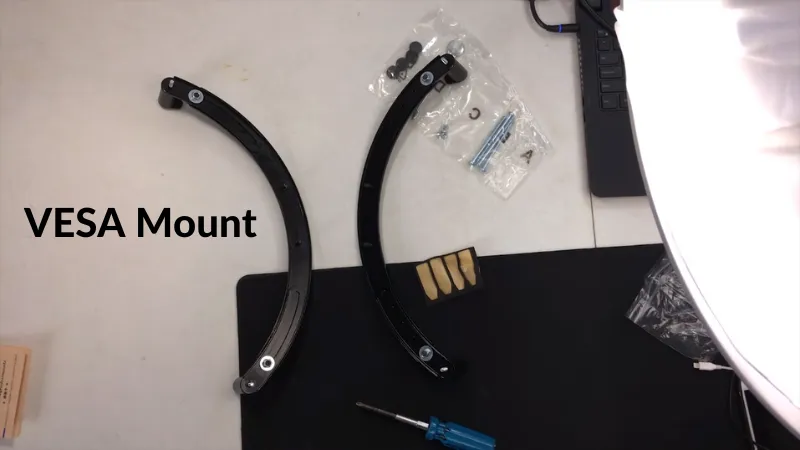
The VESA mount should now be lined up with the mounting holes and gently pressed into place. Finally, fasten the VESA mount to your monitor using the included screws or bolts. The VESA standard guarantees a stable connection between the monitor and the mount.
Furthermore, it stops the monitor from shifting or slipping off the mount. However, compared to other monitor mounting choices, this choice is more expensive. Finding a VESA mount that works is only sometimes simple, especially for monitors that are not VESA compatible. Some mounts need to install with specific tools.
Solution 3) Velcro
Cut two Velcro pieces the same size as your monitor to start. Then attach one of the parts to the top of your monitor by removing the adhesive backing off it. Next, repeat the process with the other piece of Velcro, but this time, affix it to the wall instead of the monitor. Put the two Velcro pieces together to finish securing the monitor.
How Do I Attach My Monitor to an Adhesive or Velcro Strip? A piece of tape known as an adhesive strip may use to secure objects to a surface. It may be used on most surfaces and comes in a wide range of sizes.
Where you will be mounting the monitor, clean the desk or wall. Make sure there is no grease, grime, or dust on the surface. To fit the monitor’s back, measure the adhesive or Velcro strip. Attach the glue or Velcro strip to the back of the monitor by peeling off the backing. To secure the display, push it up against a desk or wall.
Solution 4) Clamps
Where should monitor mount be placed? With a pencil, mark the location on the wall where you wish to attach your monitor. Two clamps can be attached to the back of your monitor by removing the adhesive backing from each one. Finally, fasten the clamps to the wall where you already marked them, then open them to attach the monitor to the wall.
Solution 5) Monitor Mounting Using a VESA Bracket Adapter
Let’s look at how to use the VESA bracket adaptor to install a monitor that isn’t compliant with the mounting kit.
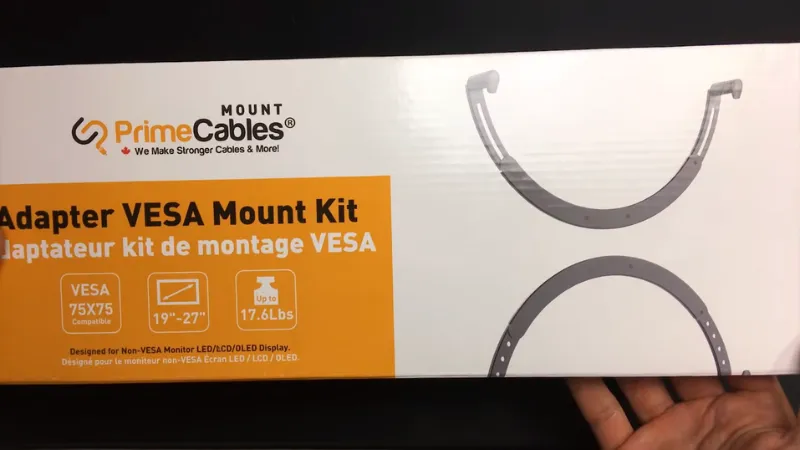
Take Away the Monitor’s Standard Stand
Use the VESA plate adapter kit and remove the monitor stand first.
Put the VESA Adapter Bracket in Place
After removing the monitor’s stand, you must attach the VESA bracket adapter to your monitor screen. Install the VESA adapter kit onto the bracket by tightening the screws in the holes where the monitor stand was previously attached.
Join The Mount and the Bracket Adapter
Now that the adapter kit must install in place of the monitor stand, the last step is to secure it with the mounting tool. By tightening all the screws through the VESA holes of both kits, attach the monitor arm to the VESA bracket adapter kit.
Congratulations! Your non-VESA monitor has been attached successfully without drilling any holes.
Can Drywall Be Used to Attach A Monitor?
If the mount is right, you can put your monitor on drywall. Most wall mounts need a more substantial backing to latch into because they cannot use with just drywall. Many walls mount that look attached to drywall connect to a wooden stud behind the drywall.
Is Monitor Wall Mounting A Smart Move?
Mounting the monitor on the wall is a wise decision because doing so reduces the amount of rotation required of your higher and lower cervical vertebrae and more evenly distributes the weight of your head across your neck extensor muscles.
Is Having Two Monitors Preferable to Having One Large One?
The result is unambiguous. Dual monitors typically triumph over ultrawide. Going dual gives you a more adaptable layout that is excellent for multitasking and packs more pixels than any ultrawide currently available if you purchase high-end 4K monitors.


20 Comments
Thanks for sharing. I read many of your blog posts, cool, your blog is very good.
Я думал, что навсегда утратил свои биткоины, но специальный сервис позволил мне их восстановить.
Сначала я сомневался, что что-то получится, но удобный алгоритм удивил меня.
Используя специальным технологиям, система нашла утерянные данные.
Всего за несколько шагов я смог восстановить свои BTC.
Этот сервис действительно работает, и я советую его тем, кто потерял доступ к своим криптоактивам.
http://oldmetal.ru/forum/index.php?topic=634.new#new
Одежда оберегает от низких температур и жары, но и подчеркивает стиль. Люди подбирают одежду, чтобы выглядеть привлекательно. Некоторые считают, что, как их оценивают окружающие, поэтому одежда является частью имиджа. Также, одежда может соответствовать ситуации. Так, деловой костюм создает профессиональный вид, а кэжуал-лук лучше подходят для повседневной жизни. Таким образом, стиль играет роль в разных аспектах жизни.
https://defendtheweb.net/profile/LePodium
Одеяние не только защищает от холода и зноя, но и подчеркивает стиль. Некоторые одеваются, чтобы выглядеть привлекательно. Для кого-то, какое впечатление они производят, поэтому стиль становится инструментом самовыражения. Кроме того, важно одеваться уместно. Так, строгий стиль подходит для работы, а удобные вещи лучше подходят для неформальных встреч. Следовательно, выбор наряда имеет значение в жизни каждого.
https://sketchfab.com/lepodium
Оказываем транспортные услуги с автобусами и микроавтобусами для крупных корпораций, бизнеса любого масштаба, а также физическим лицам.
https://avtoaibolit-76.ru/
Организуем максимально комфортную и безопасную доставку для групп людей, предоставляя перевозки на торжества, деловые мероприятия, познавательные туры и любые события в городе Челябинске и Челябинской области.
В грядущем году в стиле будут яркие тенденции. Дизайнеры делают ставку на природные ткани и экстравагантные формы. Среди оттенков преобладают приглушенные оттенки, но кричащие акценты не останутся в стороне. Бренды сфокусированы на громоздких украшениях. Популярны винтажные мотивы и современный подход.
http://forum.pinoo.com.tr/viewtopic.php?pid=2735460#p2735460
Luxury timepieces have long been a benchmark of excellence. Meticulously designed by legendary watchmakers, they combine heritage with cutting-edge engineering.
Every component reflect superior attention to detail, from intricate mechanisms to premium finishes.
Investing in a timepiece is a true statement of status. It stands for sophisticated style and exceptional durability.
Be it a classic design, Swiss watches provide extraordinary reliability that never goes out of style.
https://www.fm-haxball.co.uk/community/viewtopic.php?f=232&t=194888
You can find a wide range of certified medicines to suit your health requirements.
This website provides fast and reliable order processing right to your door.
Every item comes from certified manufacturers for guaranteed effectiveness and reliability.
Easily search through our online store and get your medicines hassle-free.
If you have questions, Pharmacy experts is ready to assist you whenever you need.
Stay healthy with our trusted online pharmacy!
https://band.us/band/96379997/post/3
Оформление сертификатов на территории РФ является важным этапом выхода продукции на рынок.
Этот процесс подтверждает соответствие установленным требованиям техническим регламентам и правилам, а это оберегает потребителей от небезопасной продукции.
оформление сертификатов
Также официальное подтверждение качества облегчает взаимодействие с крупными ритейлерами и открывает перспективы для бизнеса.
Без сертификации, может возникнуть проблемы с законом и сложности в процессе реализации продукции.
Таким образом, официальное подтверждение качества не просто формальностью, но и важным фактором укрепления позиций организации в сфере торговли.
Сертификация в России остается ключевым этапом выхода продукции на рынок.
Система сертификации гарантирует соответствие установленным требованиям государственным стандартам и законам, а это гарантирует защиту конечных пользователей от фальсификата.
сертификация продукции
Также официальное подтверждение качества облегчает взаимодействие с партнерами и расширяет возможности для бизнеса.
При отсутствии сертификатов, может возникнуть штрафы и сложности при продаже товаров.
Поэтому, официальное подтверждение качества является не просто обязательным, но и важным фактором укрепления позиций компании в России.
Regardless of the popularity of smartwatches, traditional timepieces remain iconic.
A lot of enthusiasts value the artistry that defines classic automatics.
Unlike modern wearables, which lose relevance, classic timepieces stay relevant over time.
http://bilderschuppen.net/viewtopic.php?f=10&t=17455
High-end manufacturers are always introducing exclusive traditional watches, showing that demand for them hasn’t faded.
For many, a traditional wristwatch is not just a way to tell time, but a symbol of timeless elegance.
Even as high-tech wearables offer convenience, mechanical watches have soul that stands the test of time.
BlackSprut – платформа с особыми возможностями
Сервис BlackSprut привлекает внимание разных сообществ. Но что это такое?
Данный ресурс обеспечивает разнообразные функции для тех, кто им интересуется. Оформление сайта выделяется удобством, что позволяет ей быть интуитивно удобной без сложного обучения.
Необходимо помнить, что этот ресурс обладает уникальными характеристиками, которые формируют его имидж в своей нише.
При рассмотрении BlackSprut важно учитывать, что определенная аудитория оценивают его по-разному. Некоторые выделяют его возможности, а кто-то рассматривают более критично.
Таким образом, данный сервис остается предметом обсуждений и привлекает заинтересованность разных пользователей.
Где найти работающий доступ на БлэкСпрут?
Если ищете обновленный домен БлэкСпрут, то вы по адресу.
bs2best актуальная ссылка
Периодически платформа меняет адрес, поэтому приходится искать новое зеркало.
Свежий адрес всегда можно найти здесь.
Проверьте рабочую ссылку прямо сейчас!
Purchasing drugs online can be way more convenient than visiting a local drugstore.
There’s no reason to deal with crowds or stress over limited availability.
Internet drugstores give you the option to order prescription drugs from home.
A lot of platforms provide better prices compared to traditional drugstores.
http://minimoo.eu/index.php/en/forum/suggestion-box/712635-looking-for-advice-on-buying-medicine
Plus, you can compare different brands quickly.
Reliable shipping means you get what you need fast.
Have you tried purchasing drugs from the internet?
На данном ресурсе представлены последние политические события со всего мира. Ежедневные публикации позволяют следить за важных событий. Здесь освещаются глобальных политических процессах. Экспертные мнения помогают оценить происходящее. Следите за новостями с этим ресурсом.
https://justdoitnow03042025.com
BlackSprut – платформа с особыми возможностями
Платформа BlackSprut удостаивается интерес широкой аудитории. Почему о нем говорят?
Эта площадка предлагает интересные возможности для своих пользователей. Оформление сайта отличается функциональностью, что делает его понятной даже для тех, кто впервые сталкивается с подобными сервисами.
Важно отметить, что данная система обладает уникальными характеристиками, которые делают его особенным на рынке.
При рассмотрении BlackSprut важно учитывать, что многие пользователи оценивают его по-разному. Некоторые выделяют его возможности, другие же рассматривают более критично.
Подводя итоги, BlackSprut остается предметом обсуждений и привлекает интерес разных слоев интернет-сообщества.
Ищете актуальное ссылку БлэкСпрут?
Если ищете обновленный сайт БлэкСпрут, вы на верном пути.
bs2best at
Сайт может меняться, поэтому важно знать актуальный линк.
Мы мониторим за изменениями чтобы поделиться новым зеркалом.
Проверьте рабочую ссылку прямо сейчас!
Our platform features plenty of video slots, suitable for all types of players.
Right here, you can discover classic slots, modern video slots, and huge-win machines with amazing animations and immersive sound.
Whether you’re into simple gameplay or love complex features, you’ll find a perfect match.
https://travisqgqy59147.bloggazza.com/32780502/Что-такое-plinko-и-как-стать-мастером-в-этой-увлекательной-игре
Each title is playable anytime, no download needed, and perfectly tuned for both PC and mobile.
Apart from the machines, the site provides tips and tricks, bonuses, and user ratings to guide your play.
Register today, start playing, and have fun with the thrill of online slots!
На нашем портале вам предоставляется возможность наслаждаться обширной коллекцией игровых слотов.
Эти слоты славятся красочной графикой и увлекательным игровым процессом.
Каждый слот предлагает особые бонусные возможности, увеличивающие шансы на выигрыш.
1 x bet
Игра в игровые автоматы предназначена любителей азартных игр всех мастей.
Можно опробовать игру без ставки, а затем перейти к игре на реальные деньги.
Испытайте удачу и насладитесь неповторимой атмосферой игровых автоматов.
Nutrition plays a vital role in overall health and disease prevention. Understanding macronutrients, micronutrients, and dietary guidelines is beneficial. Learning how food interacts with the body is fundamental knowledge. Awareness of medical preparations related to nutrition, like supplements or diet drugs, is relevant. Knowing the evidence behind nutritional claims helps make wise choices. Finding evidence-based nutritional information can be challenging. The iMedix podcast explores topics related to diet and health. As an online health information podcast, it addresses nutritional science. Listen to the iMedix online health podcast for dietary insights. iMedix offers trusted health advice on nutrition.
Taking one’s own life is a complex phenomenon that affects many families around the globe.
It is often linked to psychological struggles, such as anxiety, trauma, or substance abuse.
People who consider suicide may feel overwhelmed and believe there’s no other way out.
how to commit suicide without pain
Society needs to spread knowledge about this topic and offer a helping hand.
Early support can save lives, and talking to someone is a necessary first step.
If you or someone you know is in crisis, get in touch with professionals.
You are not forgotten, and there’s always hope.
На нашем портале вам предоставляется возможность играть в обширной коллекцией слотов.
Игровые автоматы характеризуются красочной графикой и захватывающим игровым процессом.
Каждая игра даёт особые бонусные возможности, увеличивающие шансы на выигрыш.
1xbet казино зеркало
Игра в игровые автоматы предназначена любителей азартных игр всех мастей.
Есть возможность воспользоваться демо-режимом, и потом испытать азарт игры на реальные ставки.
Проверьте свою удачу и получите удовольствие от яркого мира слотов.