A hardware or firmware issue is to blame when the headphone connector on an Xbox One controller stops operating. Because the headphone jacks on Xbox One controllers are not soldered, frequent use may cause the contacts to come free. If that occurs, your Xbox One might not recognize your headset, or the sound might be subpar.
Sometimes the headphone jack is blamed for audio issues when another issue is really to blame. For instance, faulty headphone connectors, a muted gaming headset, or improperly adjusted privacy preferences can all appear as headset jack issues.
The Xbox One controller headphone jack not working while playing games is very annoying. You shouldn’t worry, though. Following are a few sensible fixes. You can easily fix a similar Xbox One controller issue using these techniques.
Why Does My Headphone Jack Not Work on My Xbox Controller?
If the controller jack on your Xbox One is not working, a hardware or firmware issue may be to blame. Your Xbox One controller’s headphone jacks are not all soldered together. As a result, frequent use could cause the contacts to break. Your Xbox One is unable to identify the headset whenever this occurs. Additionally, you might hear awful sounds.
There can be a problem with the headphone jack’s audio. But there are occasions when Jack is not to a fault. It may occur due to broken headphone connectors, improper privacy settings, or a muted gaming headset. Let’s see the methods to fix Xbox series X controller headphone jack not working.
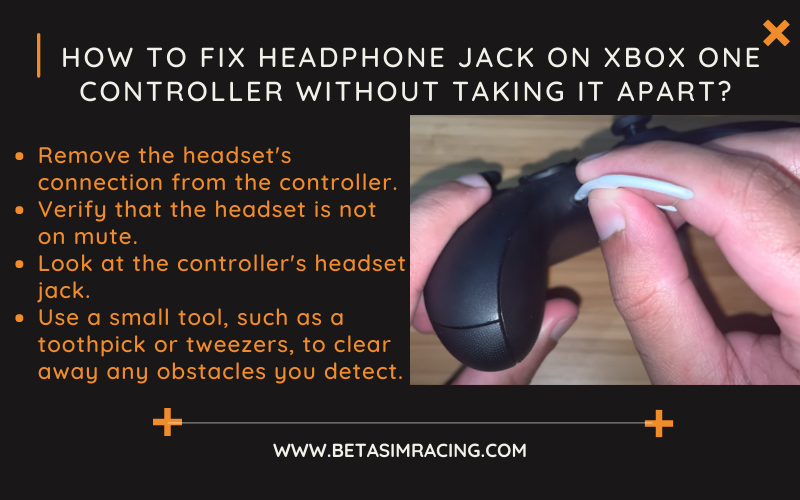
How To Fix Headphone Jack on Xbox One Controller Without Taking It Apart?
Try these steps to fix the Xbox one controller headphone jack not working Windows 10:
- Step 1 : Remove the headset’s connection from the controller, then firmly reattach it. A weak relationship between the headset and controller is why Xbox One headsets break down. The solution is frequently to unplug the connector, then firmly plug it back in.
- Step 2 : Look at your privacy settings. To check if the microphone is muted, press the Xbox button on the controller and navigate to Settings > All Settings > Account > Privacy & online safety > View details & configure > Communicate with voice and text.
- Step 3 : Verify that the headset is not on mute. Depending on the headset, there can be an integrated mute button or a mute button on the adapter. Try raising the volume while pressing the mute button to see if it helps.
- Step 4 : Examine the connector, wire, and headset for the Xbox One. If the cord, connector, or headset appears to be damaged, there can be a headset issue rather than a controller issue. Repair the cables or get a new headset if the cord is frayed or the internal wires are broken. Use a cotton swab dipped in rubbing alcohol to clean the connector if you notice any debris, such as dirt or food.
- Step 5 : Use a new headset and a different controller. The easiest method to confirm that the issue is with your controller and not the headset is to perform this test.
- Step 6 : Refresh the firmware. Update the Xbox One controller firmware if the headset functions with another controller on the same Xbox One system.
- Step 7 : Look at the controller’s headset jack. Examine the controller’s headset port using a flashlight. Use a small tool, such as a toothpick or tweezers, to clear away any obstacles you detect.
- Step 8 : The headphone jack should be replaced or fixed. After attempting the modifications mentioned earlier and attempting other controller and headphone pairings to rule out a controller-related issue, the headphone jack is damaged.
How To Replace the Xbox One Controller Headphone Jack Not Working PC?
You can disassemble the controller and see if the headphone jack is loose if you have the necessary tools. You can try to reseat the jack if it is flexible, fix it, or swap out the damaged part for a new headphone jack component. To disassemble your Xbox One controller headset port broken and repair a damaged headphone jack.
Follow these steps:
- Remove the side panels from the Xbox One controller with caution.
- The controller is held together by five hex screws. Remove them.
- The controller’s front and back covers should remove.
- Look at the headphone jack. It probably needs to be replaced if it’s loose.
- The two screws holding the upper circuit board in place should remove.
- Take a close look at the headphone jack by carefully lifting the upper circuit board.
- Use a small object like a toothpick to gently push the metal prongs out of the headphone jack component if they have been flattened.
- Check whether the headphone jack is still loose, replace it, and fasten the upper circuit board.
What To Do If Xbox One Controller 3.5mm Not Working?
Here are the steps for Xbox one controller headset port not working:
- Remove the headset, remove the headset wire from the controller’s bottom, and then firmly reattach it.
- To make sure the headset is not muted, check the mute button on the headset controls.
- Boost the audio volume. If you want to change your audio settings while using a headset that has a 3.5mm jack.
- Go to Profile & system > Settings > Devices & connections > Accessories, then choose your controller.
- To rule out a hardware issue, try a different controller or headset.
- Ensure you are using the most recent software.
How Do I Clean the Headphone Jack Port?
The simplest activities to complete are cleaning headphone jacks. You must know how and have the right tools to perform it correctly. These are the techniques for cleaning headphone jacks:
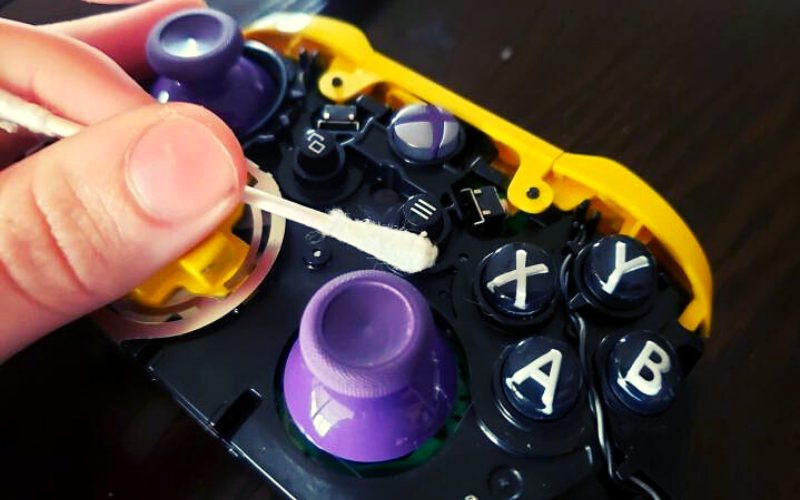
Cotton Swab Method
Cotton swabs are the most widely used technique for cleaning your headphone jack. You have cotton swabs in every home, which is the simplest way to clean your headphone jack. The method is:
What requires:
- Fabric swabs
- Rub alcohol
Follow steps:
- Turn off the device whose headphone jack you want to clean first.
- Take a cotton swab and roll the tip with your fingers, so it is pointed.
- Insert the cotton swab’s sharp end into the headphone jack.
- Continue rotating the swab within the headphone jack repeatedly.
- Carry out the procedure twice.
- Take the used cotton swab once more and aim the opposite end as you did before.
- Lightly dip the tip of the swab into the rubbing alcohol.
- Place the dipped cotton swab in the headphone jack and roll it around.
- After some time, remove the wet cotton swab from the jack and replace it with a dry cotton swab.
- Repeat the previous steps.
How Do You Fix a Broken Headphone Jack Without Soldering?
You need an AUX cable to fix your headphones. You have two options: utilize the cord with your broken headphones or invest in a new set. The steps are listed below:
Disconnect the AUX Cable
The AUX cable must first be severed seven meters away from the connector. Don’t make it too brief. If a mistake is too long, it cannot be fixed.
Guide: What are Front Panel Connectors on Motherboard
Remove the Rubber Sheath
To do this, make a little cut in your rubber sheath. The incision on the sheath will diverge if you bend it. Next, carry out the identical action on the other side. The sheath may now be readily removed. Pay close attention to prevent cutting the wire during this process.
Clean Up the Varnish
Manufacturers weave copper wires with nylon threads known as Kapron to boost their tensile strength. You must remove the copper cable to attach it to the headphones. Light the wire’s end with a torch for a brief period when the spark is one centimeter from the wire. Then the cables will be severed.
Cut the Headphones’ Wire
Similar to how AUX wires are cut, headphone cables are also cut. At least a 3 cm incision should be made in the connector. The procedure for washing the varnish can repeat.
Turn the Wires
There could be three to five wires in your headphone cable. Your headphones’ three wires must be linked to the AUX cord. The three most popular hues are red, blue, and gold. Not all headphones have gold; some can be constructed with yellow or green. The difficult phase is now. These wires are twisted together in this manner.
Ground wires are always referred to as being of gold colour. Twist the gold wires of the AUX cable and the headphones together. Twist wires of the same colour together.
Take Wires Out
The wires are no longer covered with insulation because the varnish has been removed. It is necessary to isolate and twist each wire. Then use Scotch tape to join them. You are now ready to go. You can listen to the songs and music of your choice while wearing headphones.
Just enough heat from a lighter will soften the paperclip’s tip. Push the paperclip straight down the center of the socket until it reaches the headphone jack.
It typically occurs when the device’s auxiliary port gets unclean and oxidized, degrading your headphones’ sound quality. Simply cleaning the additional port until all debris is removed and the annoying static noise is gone will solve the issue.
Two wires must cover with a tiny, pre-cut piece of electrical tape. After that, reposition the heat-shrinking tubes over the shielded cables. To prevent touching the flame on the tube, hold the lighter below the tube. The tubing will shrink and tighten up around the wiring as a result.